Menu

Patterning a Boat for a New Mattress: A Comprehensive Guide
Introduction:
If you own a boat, you understand the importance of comfort while out on the water. One essential aspect of comfort on your vessel is having a well-fitted mattress. Over time, boat mattresses can become worn out and uncomfortable, necessitating the replacement of your old mattress with a new one. To ensure the perfect fit for your boat, you'll need to pattern your boat's sleeping area. In this guide, we'll walk you through the steps to pattern a boat for a new mattress, so you can enjoy restful nights on the water.
Tools and Materials:
Before you begin patterning your boat for a new mattress, gather the necessary tools and materials:
1. Large sheets of craft paper or plastic sheeting
2. Tape measure
3. Pen or pencil
4. Scissors or utility knife
5. Painter's tape
6. Cardboard or foam board (optional)
7. Digital camera or smartphone (optional)
Step 1: Prepare the Area
Start by removing any existing mattresses or bedding from the boat's sleeping area. Ensure the space is clean and free of debris.
Step 2: Choose Your Material
Decide whether you want a foam or innerspring mattress. Foam mattresses are often more customizable and easier to shape to fit irregular boat berths, but innerspring mattresses can provide additional support and comfort. Once you've made your choice, proceed with patterning.
Step 3: Measure the Sleeping Area
Use a tape measure to measure the length, width, and depth of the boat's sleeping area. Be precise with your measurements, as accuracy is crucial to achieving a perfect fit.
Step 4: Create the Patterning Template
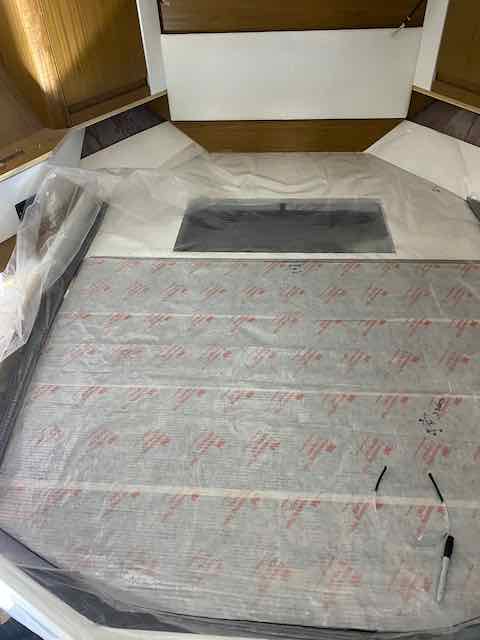
To create a patterning template, lay large sheets of craft paper or plastic sheeting over the sleeping area. Overlap multiple sheets if needed to cover the entire space. Secure the sheets in place with painter's tape to prevent them from moving while you work.
Step 5: Trace the Sleeping Area
With the sheets in place, use a pen or pencil to trace the exact shape and dimensions of the sleeping area. Ensure that you capture all the contours and curves accurately. If your sleeping area has irregular shapes, consider using cardboard or foam board to create templates for those specific areas.
Step 6: Add Markers and Labels
To help the mattress manufacturer understand your patterning, add labels and markers to indicate specific details. Include measurements, orientation, and any additional instructions you may have. It's also helpful to take photos of the patterning process with a digital camera or smartphone to provide further clarification.
Step 7: Remove and Cut Out the Template
Carefully remove the craft paper or plastic sheeting from the boat's sleeping area. Use scissors or a utility knife to cut out the traced template along the lines you've drawn.
Step 8: Contact a Professional
Now that you have a precise patterning template, it's time to contact a professional mattress manufacturer or upholstery specialist experienced in boat mattresses. Share your template and provide them with all the necessary details, including material preferences, mattress thickness, and any additional customizations you desire.
Step 9: Review and Confirm
Work closely with the manufacturer to review the patterning template and confirm that all measurements and instructions are clear. This step ensures that your new mattress will be tailored perfectly to your boat's sleeping area.
Step 10: Install Your New Mattress
Once your custom boat mattress is ready, carefully install it in your boat's sleeping area, following the manufacturer's instructions.
Conclusion:
Patterning your boat for a new mattress may seem like a meticulous process, but the comfort and restful nights it provides are well worth the effort. By following these steps and working with a professional mattress manufacturer, you can ensure that your boat's sleeping area is perfectly fitted for the mattress of your dreams. With a comfortable mattress in place, you'll be ready to enjoy many more memorable nights on the water.
- Choosing a selection results in a full page refresh.


